Creating a 3D Character from an Image with AI | Failures and Solutions in Attempting a VRChat Avatar with Hunyuan3D-2.1
I am challenging myself to see how much I can outsource to AI on my own PC, from character design to modeling, rigging, and VRChat settings. To put it simply: so far, it hasn't been going well. In this article, I honestly summarize what I did, what failed, and my next strategy, and I'm looking for opinions from those with more expertise.
- Steps and time required to create a 3D character from a single image
- Common 'AI trope' failures caused by the 3D conversion AI
- Candidates for the next remake and call for opinions
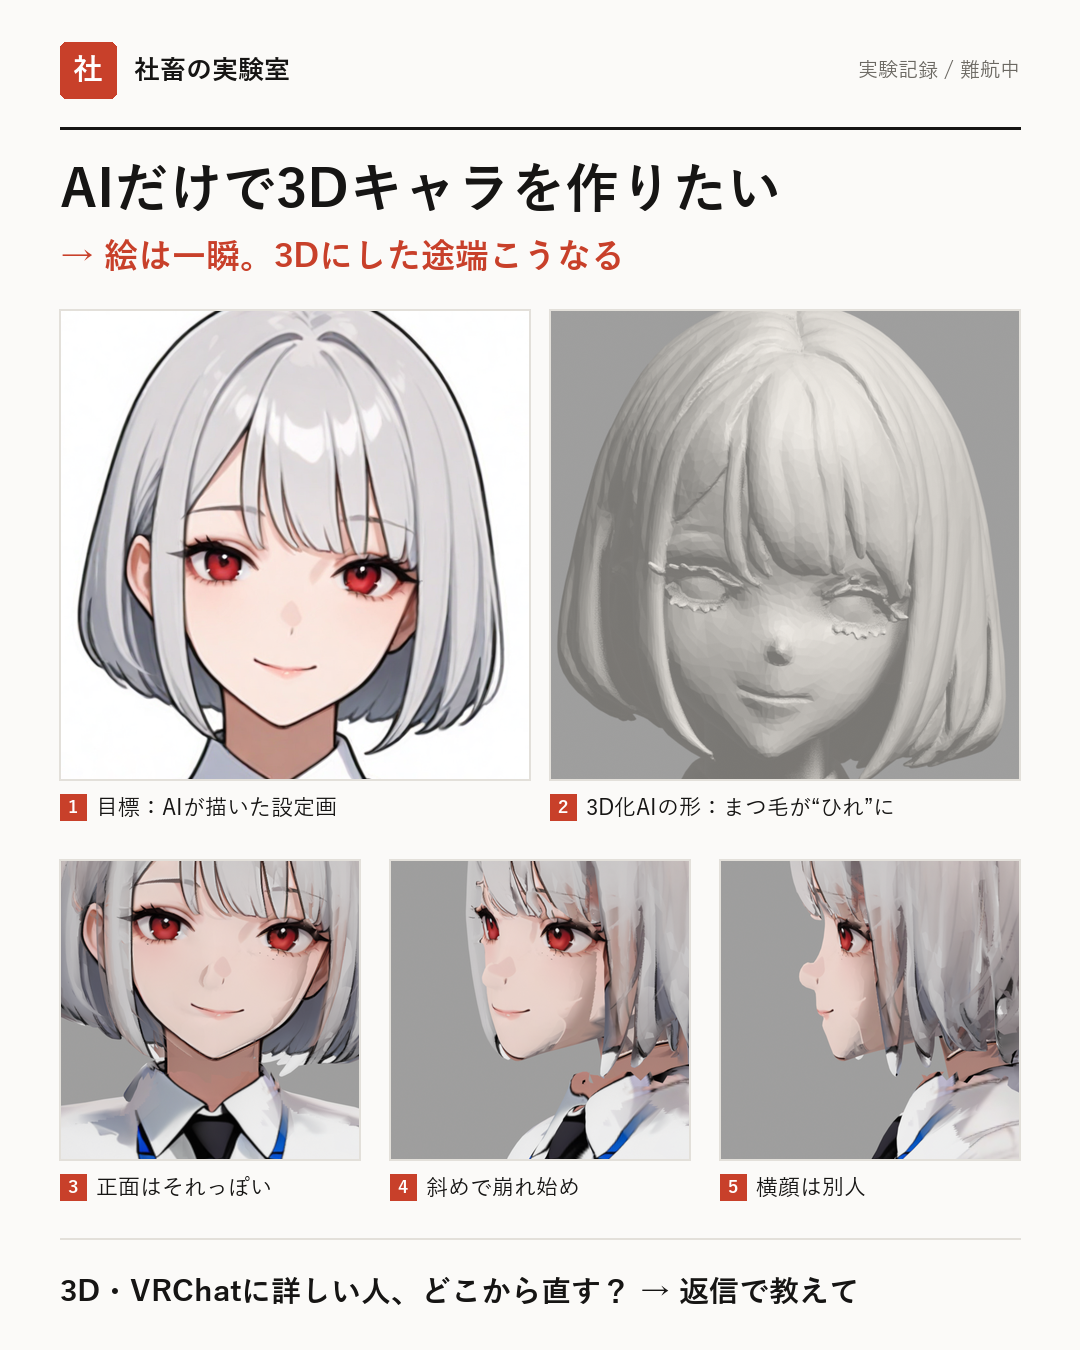
Wanting to Create a VRChat Avatar with Image→3D AI
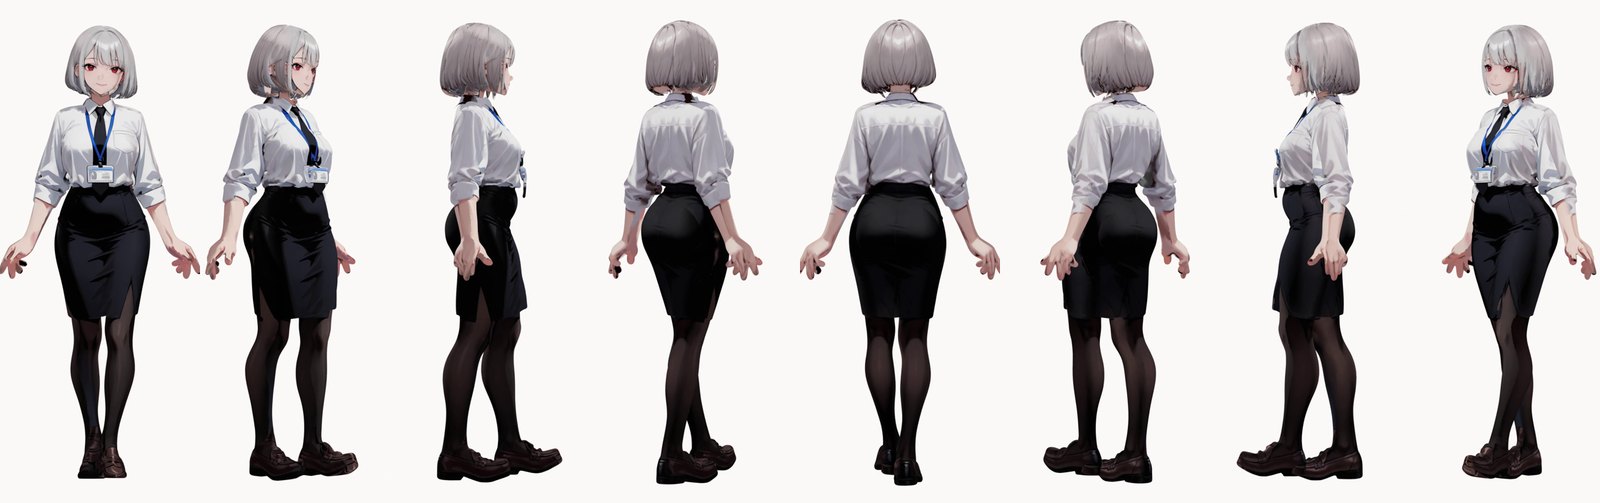
The goal is to have as much of 'one avatar that looks natural when looking in the mirror' created by AI as possible. I am trying to connect processes that originally take specialists many days (character design → modeling → coloring → rigging → VRChat settings) using AI running on my own PC (RTX 4080, VRAM 16GB) and automation.
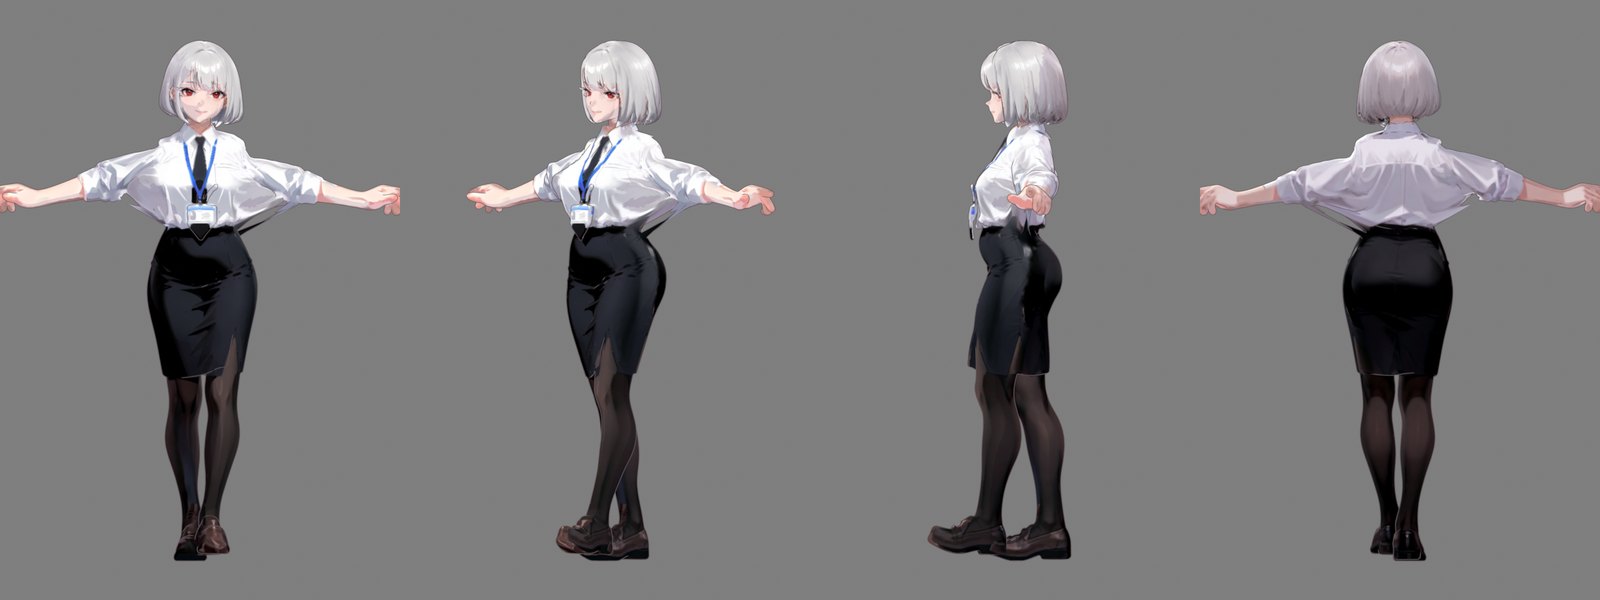
I am using Forge for drawing the design sheets, Hunyuan3D-2.1 for creating 3D shapes from images, and Blender for coloring and verification. Because Hunyuan3D-2.1's coloring function requires more than my available VRAM, I let the AI create only the shape and manually apply colors by pasting textures.
- Design sheet: Approx. 7 seconds per image
- Image→3D (Shape): Approx. 67 seconds, Max VRAM 7.6GB
- Coloring + rotation video: Approx. 3 minutes per avatar for the first version
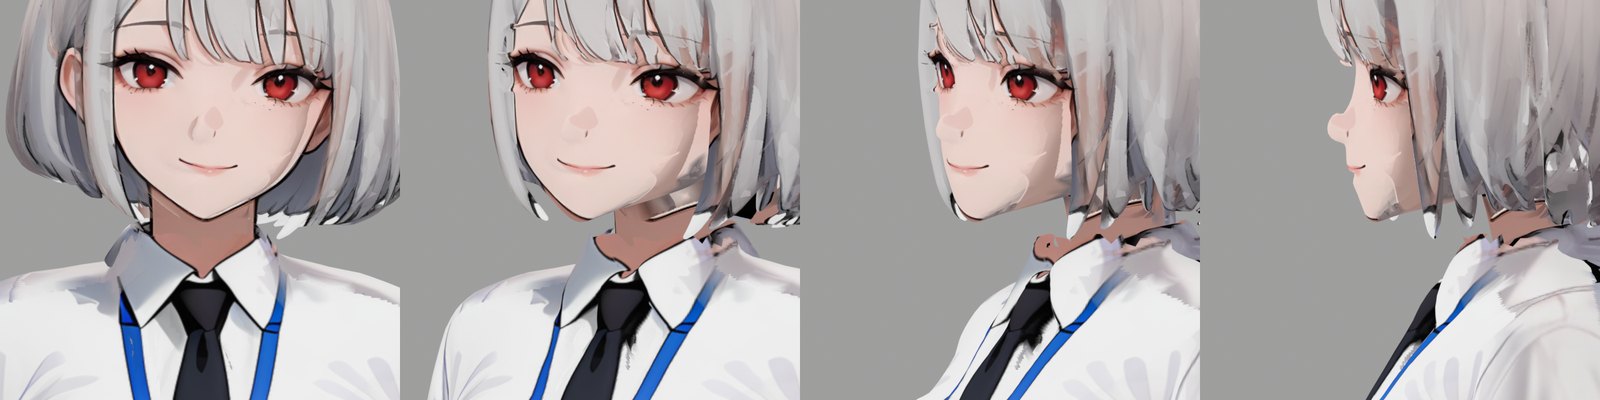
Results of 3D Conversion with Hunyuan3D-2.1: Weak Side Profile
For the first avatar, shapes like the collar, tie, employee ID badge, and skirt slit actually formed, and it looked quite convincing from the front. However, when viewed from an angle or from the side, the face breaks down. The side profile looks like a completely different person than the original drawing.
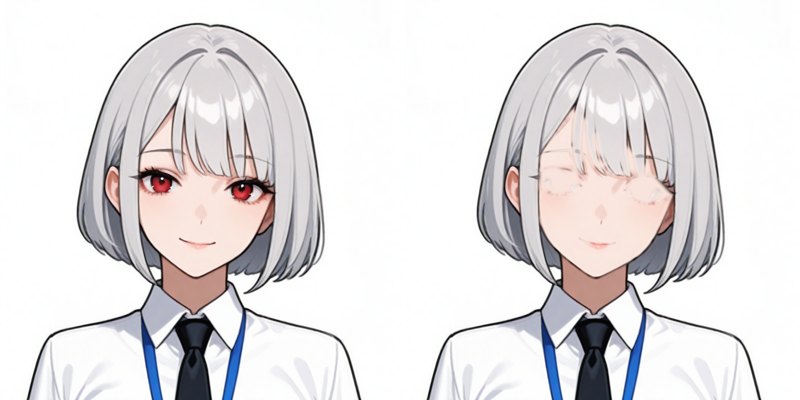
One cause is resolution. The 3D conversion AI shrinks the input image to about 518 pixels, so in a full-body drawing, the face only has about 30–40 pixels. I also tried cutting out and enlarging just the head to convert it to 3D separately and swap it onto the body. While this made the nose and chin appear on the side profile, now even the eyelashes became 3D.
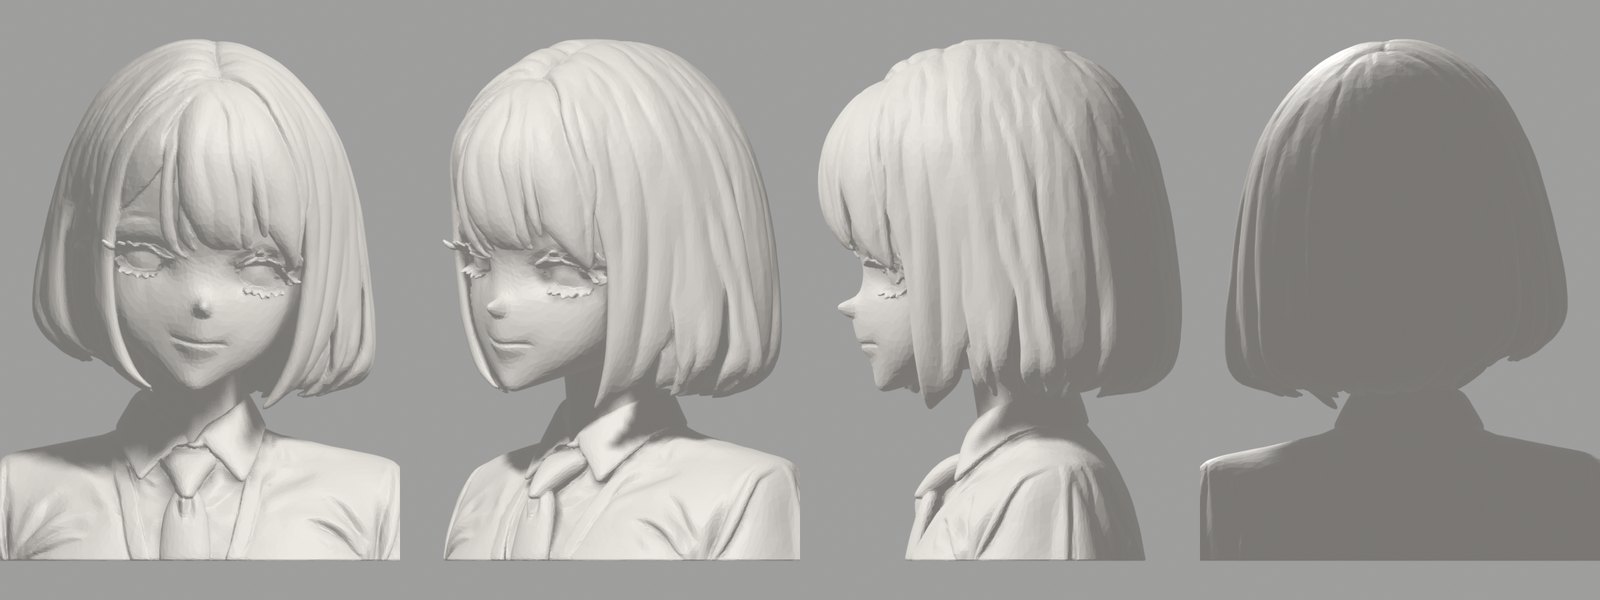
6 Common 'AI Trope' Failures in 3D Conversion
Many of the methods I tried to fix it failed. However, thanks to those failures, I gained a good understanding of the AI's habits. Here are the main ones.
- Eyelash lines were carved as thin plates (fins) protruding from the face
- Even when providing an image with eyes filled in, the AI carved eyes and eyelashes itself
- An employee ID badge was drawn on the back (caused by my prompt instructions)
- The side-facing image drawn by the AI had a shifted face position, causing the eyes to appear in the hair
- The AI for removing backgrounds identified the white shirt and silver hair as background and deleted them
- When automatically rebuilding the mesh, the nose and eye edges became jagged
Don't Treat Lines and Shadows as Color: Reflection on How Fixing It Broke It More
Halfway through, I realized that I was baking the illustration's line art and shadows directly as 'colors.' In the anime-style display (Toon shading) commonly used in VRChat, it is normal to keep the textures as base colors and apply lines and shadows during rendering. I changed my workflow, which made the seams of the clothes clearer.
On the other hand, while correcting parts I was concerned about one by one, the overall look actually fell apart. To be honest, the earlier versions looked better. Instead of piling on corrections, I decided to rethink the creation process from the start.
What I Learned Comparing with Professional VRChat Avatars
For comparison, I examined the contents of a CC0 base model that allows free modification (lowteq's 'Chapel'). It is light at about 28,000 triangles total and approximately 4,900 triangles for the head; the eyes and mouth are drawn with textures rather than being carved into the shape. There were 48 shape keys for expressions and over 50 bones for hair movement.
3D conversion AI carves fine bumps and hollows into the face, but skilled avatars are made of 'smooth surfaces with few polygons + eye/mouth drawings.' The eye sockets and facial irregularities I struggled with so far were things that wouldn't happen in the first place with this type of construction.
Automatic Rigging Seems Usable: Next Strategy and Call for Opinions
There is some bright news. When I tried SkinTokens to automatically add bones, it inserted 52 bones (including fingers) in the same order as a VRChat humanoid in 28 seconds, and the clothes didn't tear when moving the arms. There is hope for resolving the rigging issue.
The remaining challenges are the face and hair. I plan to rebuild from scratch next, with the following three candidates. For those familiar with 3D or VRChat, please let me know which one is better, or if there's another method, via a reply on Threads or the inquiry form.
- A: Stick with the current method (Image→3D conversion)
- B: Use a free base model (CC0) as a foundation and let AI handle the face drawings and clothing colors
- C: Put AI-generated hair and clothes onto a base model
- People who want to try creating 3D models or avatars with AI
- People interested in VRChat avatar creation
- People looking for the next use case for image generation AI
- Image-to-3D AI
- An AI that creates 3D shapes from a single image or photo
- Texture
- A drawing pasted onto the surface of a 3D model. Determines color and patterns
- Toon shading
- A display method that adds anime-style shadows and outlines
- Rigging
- The process of inserting bones to move the body and establishing their relationship with the skin
FAQ
What kind of PC are you running this on?
A PC with an RTX 4080 (VRAM 16GB). Image→3D conversion used up to 7.6GB of VRAM. Everything is running on my own PC.
Will you distribute the character you made?
No plans for that at the moment. Once I can make them well, I plan to summarize the creation process on this blog.
Where should I send my opinions?
Please reply to the post on Threads or use the inquiry form on this site. Even just a number (A~C) would be helpful.
Methods for creating 3D characters from a single image are strong from the front but break at the side profile and facial details. Since there is hope for rigging, I will change how I create the face and hair and rebuild from scratch next. I will report on my progress on Threads and this blog.